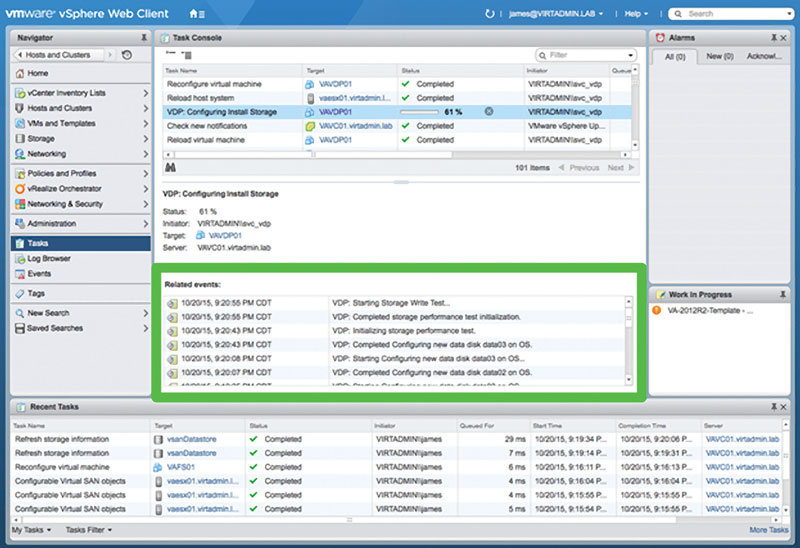
Vsphere Data Protection 6.0
During the initial vSphere Data Protection configuration you can configure the network settings and time zone information for your vSphere Data Protection Appliance. You use the vSphere Data Protection configuration wizard to register the vSphere Data Protection Appliance with vCenter Server.

- Deploy the vSphere Data Protection Appliance.
- Read the vSphere Data Protection Administration Guide for the complete list of steps to configure vSphere Data Protection.
- Verify that enough disk space is available on the datastore. When an optional performance analysis test is run during the initial configuration of the appliance, 41 GB is required for each disk on each datastore. If the available space is not enough, the test reports a value of 0 for all of the read, write, and seek tests, and displays a final status of insufficient space.
- Use the vSphere Web Client to log in as an administrator to the vCenter Server instance that manages your environment.
- In the vSphere Web Client, select vCenter Inventory Lists > Virtual Machines.
- Right‐click the vSphere Data Protection Appliance and select Open Console. After the installation files load, the Welcome screen for the vSphere Data Protection menu appears.
- In a Web browser, navigate to vSphere Data Protection Configuration Utility URL. https:// ip_address_VDP_Appliance:8543/vdp-configure/
- Log in as root. The vSphere Data Protection configuration wizard appears.
- On the Network settings page of the wizard, enter or confirm the network and server information for the vSphere Data Protection Appliance, and click Next.
Ensure that the values are populated correctly, otherwise the initial configuration fails.
- Select the appropriate time zone for your vSphere Data Protection Appliance and click Next.
- On the VDP credentials page, select a new root password for the virtual appliance and click Next.
- On the vCenter Registration page, register the appliance with vCenter Server:
- In the vCenter username text box, enter a vCenter Server administrator user name. For example, administrator@vsphere.local.
If the user belongs to a domain account, enter the user name by using the DOMAINUserName format.
Important: If you enter the vCenter Single Sign-On administrator user name in the user principal name (UPN) format, the tasks related to vSphere Data Protection operations do not appear in the Recent Tasks pane of the vSphere Web Client. If you want to use the vCenter Single Sign-On administrator user name, enter the vCenter Single Sign-On user name in UPN format. - In the vCenter password text box, enter the vCenter Server password.
- Enter a vCenter FQDN or IP address.
- (Required) Change the default vCenter Server HTTP port. Enter a custom value for the HTTP port if you must connect to vCenter Server over the HTTP port, instead of the HTTPS port, which is used for all other communication.
- Enter a vCenter HTTPS port (the default is 443).
- Select the Use vCenter for SSO authentication check box.
- (Optional) Click Test Connection. A connection success message appears. If this message does not appear, troubleshoot your settings and repeat this step until a successful message appears.
- In the vCenter username text box, enter a vCenter Server administrator user name. For example, administrator@vsphere.local.
- Click Next and respond to the wizard prompts to complete the configuration.
Create a backup job with specific retention policy and backup schedule. For more information, see Create a Backup Job in vSphere Data Protection.
Deploy the vSphere Data Protection Appliance. Read the vSphere Data Protection Administration Guide for the complete list of steps to configure vSphere Data Protection.; Verify that enough disk space is. VSphere Essentials and vEssentials Plus are designed especially for small organizations just getting started with virtualization. Both provide virtualization and centralized management for up to three server hosts. VSphere Essentials provides server consolidation to help you get the most out of your hardware. VSphere Essentials Plus adds features such as vSphere Data Protection for agent.
Proshow gold download for mac. Filename:Photodex.ProShow.Gold.9.0.3769 Portable.zipFilesize:107.40 MBDownload:We will update ProShow Producer.torrent soon. Choose “No” to reboot question.– Don’t launch the program after it’s installed.– Run Activation as Admin. How to Crack Proshow Gold 9?– Install program by choosing Trial. It’s set to default location, you can customize if you located in another path than default.– Merge the provided reg entry.– Block program in firewall for both incoming and outgoing connections.– Created a couple of slideshows in 720p media type by importing all effects and transitions, no issues are met.– If you use the program, consider buying it to support it’s development.You might want to for instant using without installation.In addition to creating slide shows such as Proshow Gold, Proshow Producer as a brother added all that Proshow Gold lack.