How Long For Secure Erase Mac
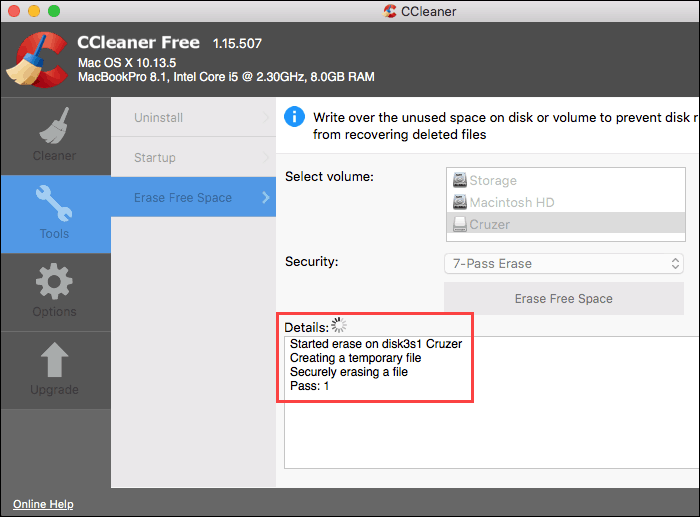
Notice the “Delete Free Space” and “Security Options” catches are presently interactive of course, choose “Security Options” and select your level of secure eradication, “35-Pass Erase” is by a wide margin the most secure yet takes 35 times longer since it actually composes over the drives existing information 35 times. Why you need to erase your hard drive/SSD. When you empty your trash bin on your Mac, the files are not really erased. Instead, the reference to the file is removed from the file system (which keeps a list of all the files on your computer), so the computer is able to write new information in the same physical area when space is needed.
That little silver trash can on your Mac’s desktop represents an invisible Mac trash folder. Technically, items in your trash are still on your Mac, as you can drag them right back out. To delete those items, you simply empty the trash. But are they really gone?
In this post, we’ll talk about the difference between “empty trash”, “empty trash securely”, why Apple removed that feature from El Capitan (ugh!) and how to make sure your deleted files are well and truly gone. But, if you don’t care all that much about the what and the why, jump straight to the how: here are two ways to empty trash securely.
The difference between Empty Trash and Secure Empty Trash
When you empty trash in OS X, the files inside aren’t actually erased. The space they occupied is marked by the system as available for overwriting, but the files themselves remain on your drive until they’re overwritten by something else. This means if someone wanted to recover deleted files with special software, they have a chance to succeed, although it’s a tedious process. This is where the secure empty trash feature comes in.
When you empty trash securely, the system writes a series of ones and zeroes over the file you’ve deleted, making it impossible to recover. This feature was an option in OS X until the release of El Capitan, when Apple removed it. Here’s why that happened.
Why Apple pulled Secure Empty Trash from El Capitan
Here’s Apple’s statement on why Secure Empty Trash was removed from El Capitan:
“Finder Available for: Mac OS X v10.6.8 and later Impact: The 'Secure Empty Trash' feature may not securely delete files placed in the Trash Description: An issue existed in guaranteeing secure deletion of Trash files on some systems, such as those with flash storage. This issue was addressed by removing the ‘Secure Empty Trash’ option.”
Why? Because Apple figured they could not guarantee the entire files were being securely deleted on all available systems.
See, the Secure Empty Trash feature was built around hard drive technology, and a lot of Macs use solid state drives now, which store data in a completely different way. On an SSD, each erasable area of memory actually suffers wear-and-tear with each write and erasure. That is why, special management software monitors memory use across the drive, rotating through available writable units. Because of that, it’s possible that certain data will be missed by the secure empty sweep.
Why all the technical mumbo jumbo in this article? Because it explains why Apple removed secure empty trash from OS X El Capitan, and allows us to introduce alternate methods. It’s still possible to securely empty the trash on your Mac.
How to secure empty trash in OS X El Capitan
There are two ways to securely remove files. The first isn’t for the faint of heart, the latter is simpler and safer:
- With a Terminal command
- With CleanMyMac X (download it free)
1 Terminal
Before we begin, a note. You can make a mess of things with Apple’s Terminal. It’s crucial to understand the commands and type them without errors. If you start to sweat a bit just reading this, move on. There are alternatives. Otherwise, here we go.
First, open Terminal. You’ll find it in Finder > Applications > Utilities. Now, type the following command, then leave a space after the “v” and lastly, drag the file you wish to delete after the space:
Hit return. Vgn-fj290p drivers for mac. Your file is gone. Of course, you’ll have to repeat the procedure for each individual file, so it’s not exactly emptying the Trash bin with a click. If Terminal doesn’t sound like an option for you, let’s try something else.
2CleanMyMac X
Fortunately, you can empty trash securely in a click with CleanMyMac X. Not only does it empty your desktop trash, but it also cleans up all the other trash bins on your Mac, including those most often overlooked.
Multiple trash bins? Yes! For example, Photos has its very own trash. When you delete an image from Apple’s Photos app, it’s actually moved to the Photos trash. You won’t see it in your desktop trash can. The same goes for Mail, Aperture, external drives and more. Even if you forget about theses bins, CleanMyMac does not. So, let’s take a closer look at how you can empty all the trash bins securely with CleanMyMac X.
Once CleanMyMac is running, click the “Trash Bins” icon on the left hand side, and then hit Scan. CleanMyMac X browses all the trash bins on your drive and in your apps, finds everything that can be securely removed, and shows you a list of what it has found.
After completing a scan, you can browse what’s been found, and easily de-select any file you’d rather keep. For a more detailed view, click Review Files to see what’s been identified in each individual trash bin. If you’d like to inspect a file itself, just hover your cursor over its name and then click the magnifying glass icon to open that item’s enclosing folder.
Finally, we’ve been talking about securely removing files once and for all, so let’s do that with CleanMyMac X.
Even though Secure Empty Trash is no longer a native function in OS X El Capitan, you can still empty your Mac’s trash securely with CleanMyMac X. Try CleanMyMac and be sure the files you delete are really gone.
These might also interest you:
Due to one's job or duty, he/she may have connections with confidential or extremely private documents. If these files are leaked out, one must be responsible for that. Google sketchup pro 8 full. What's worse, one may end up in court with a lawsuit. Hence one needs an authentic eraser to permanently and securely delete files on Mac.
Don't Miss Out:
If you're reading this article, here's the right place for you. I've also noticed that some posted threads on Apple Communities asking for shredding files on Mac/MacBook/iMac like the image shows. Please keep on reading.
Reason: Why You Need A File Shredder?
Some may be having a misgiving - why not just directly move unwanted files to trash and empty it? If you're a tech-savvy, you'll know that documents removed from the trash are still recoverable via professional file recovery software.
The operation of emptying a trash on Mac is just a way to close the visual gate for users to access deleted files. Yet, they are still retrievable as long as not overwritten. If you're sure that nobody will come after you delete documents in the trash, perhaps you should give it a try. Or, please try the following methods.
Approach 1: How to Permanently and Securely Remove Files on Mac?
FonePaw MacMaster is all-singing and all-dancing Mac manager with multiple useful functions compatible with macOS X/Captain/Yosemite/Sierra, of which there is a File Shredder. As the name tells, it can technically shred all files making sure that the files are no longer recoverable. To know your way around it, please check out how it works.
Step 1. Get Started with MacMaster
Do you see the download button above? Click on it and start with MacMaster. Then, launch the program on your Mac and navigate to the 'Eraser' function.
Step 2. Choose Files/Folders to Shatter
Now, click 'Select Files' to the next page as below. Then, hit Add Files and navigate to those you want to erase permanently. If you make a wrong selection, you can deselect the folder. Make sure that you've chosen the desired folders.
Step 3. Start Shredding Documents
When you click 'Erase' at the bottom, you'll be warned whether to eliminate selected ones, for the process is irreversible. The process ends in no time with a 'Cleanup Completed' message shown on the screen. Now, you'll never find these files back again.
Approach 2: How to Manually Secure Empty Trash on Mac?
Apart from the normal way to empty a trash, Mac has also introduced an enhanced option - 'Secure Empty Trash'. I guess most of you may not even know it. No worry. It's easy to use with these steps:
Step 1. Hold the 'Control' key and click the 'Trash' icon.
Step 2. Press the 'Command' key on OS X Yosemite and latter, or press 'Control' or 'Option' instead.
Step 3. Click 'Secure Empty Trash' and again.
However, Apple pulled 'Secure Empty Trash' from El Capitan since 2015. Here's Apple's statement on why Secure Empty Trash was removed from El Capitan:
It cannot be more careful when it comes to tackling confidential or private files. MacMaster is a prior choice if you want to ensure that there is no possibility to recover anything back.
- Hot Articles
- How to Find out Large Files on Mac OS X
- Uninstall Spotify on Your iMac/MacBook
- How Do I Delete Google Chrome from My Mac
- [Solved] Cannot Empty the Trash on Mac
- How to Find and Remove Duplicate Files Mac OS X
- How to Reset Safari Browser on Mac
- 3 Must-have File Management Software for Mac